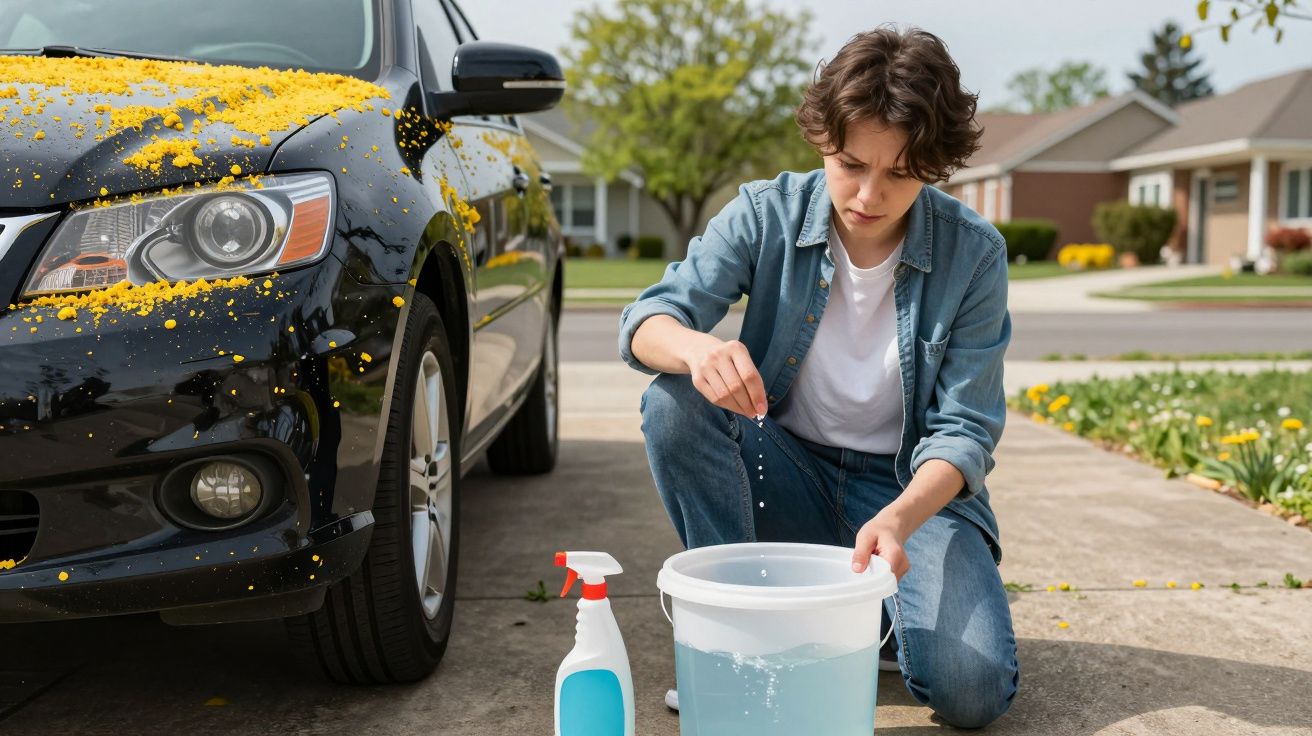
The first warm weekend of spring, you promise yourself you’ll finally clean the car. Ten minutes later the driveway looks like a crime scene of yellow dust, the sponge drags, and by the time you’ve rinsed everything off, the paint is streaked and the glass is worse than when you started. Pollen feels like it ignores normal car shampoo and clings on out of spite.
That’s when the old family debate kicks off: someone suggests “just use Fairy”, someone else swears it ruins paint, and you’re left staring at a bottle of washing‑up liquid wondering who to believe. Professional detailers have their own answer-and it’s not a sinkful of suds.
The surprising truth: a tiny amount of washing‑up liquid, used in the right way, can help lift pollen and stop streaks, without stripping every last bit of wax from your paintwork. The trick lies in dosage, timing and what you mix it with, not in turning your car into a bubble bath.
Why spring pollen beats your normal wash
Pollen is waxy and lightweight. Instead of sliding off with mud and road film, it floats in rinse water, dries in place and bonds to any sticky residue on the paint. On dark cars, one drive through blossom season can make the bonnet look like it’s been dusted with flour.
Most people unknowingly make three mistakes:
- They start scrubbing dry or nearly dry panels, grinding pollen in.
- They use very hot water and too much shampoo, creating thick foam but not better cleaning.
- They rush the rinse and drying, so dirty water dries in blotches and streaks.
Pollen problems are less about the colour of your car and more about how you move water over the surface. You want dirt to glide away, not skate around and settle back down. That’s where a tiny boost of surfactant from washing‑up liquid can quietly change the result.
The tiny drop of washing‑up liquid detailers actually use
No serious detailer will tell you to replace car shampoo with neat washing‑up liquid every Sunday. It’s formulated to cut through baked‑on grease, which means it can also nibble away at wax and sealants if you overdo it. Used in kitchen‑sink quantities, it will leave paint unprotected.
Used sparingly, though, it becomes a helpful tool, not a wrecking ball.
Think “pin‑head in a bucket”, not “big green squirt on a sponge”.
Detailers who quietly use it in spring do one of two things:
Add a tiny drop to a bucket of car shampoo
- 8–10 litres of lukewarm water
- Normal dose of pH‑balanced car shampoo
- Plus a drop or two of washing‑up liquid, no more
This boosts the mix just enough to break pollen’s waxy coating and help rinse water sheet off more cleanly.
- 8–10 litres of lukewarm water
Use a weak washing‑up liquid mix only as a one‑off decontamination
- Once or twice a year at most
- Before polishing or re‑waxing the car anyway
- To strip old, patchy products and stubborn film in one go
- Once or twice a year at most
For a simple spring pollen wash, the first method is the one to copy. You keep the gentleness of a proper car shampoo, with a slight extra bite for the stubborn yellow dust.
Step-by-step: a streak‑free wash for a pollen‑covered car
Handled methodically, a pollen wash becomes quick and almost boring-in a good way.
1. Set up your buckets and tools
- 2 buckets (one for soapy water, one for rinse water), ideally with grit guards.
- pH‑balanced car shampoo.
- Microfibre wash mitt, not a yellow sponge (sponges trap grit on the face).
- Soft microfibre drying towel or two.
- Optional: a pressure washer or hose with a gentle spray setting.
Fill one bucket with clean water (rinse bucket). Fill the second with 8–10 litres of lukewarm water and the normal dose of car shampoo. Now add your tiny bit of washing‑up liquid: one small drop, or two at most. Swirl gently to mix-no need for a foam party.
2. Rinse first, always
Before anything touches the paint, hose the car down from top to bottom. The goal is to float off as much loose pollen as possible.
If you have a pressure washer, keep the lance moving and don’t get closer than about 30 cm to the paint or rubber seals. Glass and wheels can handle more pressure than delicate badges and trim.
3. Wash from the cleanest area down
Dip the mitt in your soapy bucket, then start with the roof. Work in straight lines rather than swirls, turning the mitt frequently and rinsing it in the clean‑water bucket after every small section.
Order matters:
- Roof
- Upper sides and windows
- Bonnet and boot
- Lower doors and sills
- Bumpers and the grubby rear panel
The rinse bucket stops you dragging grit and pollen back over already‑clean sections. The boosted shampoo mix loosens the yellow film so the mitt glides instead of squeaking.
4. Rinse like it matters (because it does)
Once every panel has been washed, rinse the car thoroughly. Here, water behaviour tells you a lot:
- If water sheets in smooth sheets, your dilution is about right.
- If it clings in patchy, foamy blobs, you’ve used too much product.
Keep rinsing until the water runs clear and you can no longer see suds. This is what prevents dried detergent marks and chalky streaks.
5. Dry gently to avoid water spots
Use a large, soft microfibre drying towel, laying it flat and dragging lightly, rather than scrubbing. Start at the roof again, working down.
If the towel becomes very damp, switch to a dry one rather than wringing constantly. For glass, finish with a dedicated glass cloth and a spritz of glass cleaner if needed. This last step is what turns “I washed it” into “it looks detailed”.
How much is too much? A quick guide
| Mix type | What it’s for | Risk level |
|---|---|---|
| Straight washing‑up liquid in a bucket, thick foam | Stripping wax, degreasing engine bays | High – not for routine washes |
| Car shampoo + tiny drop of washing‑up liquid | Spring pollen, traffic film boost | Low when used a few times a year |
| Proper pH‑balanced car shampoo only | Regular weekly/fortnightly washes | Very low – ideal long‑term |
Used the “detailer way”, washing‑up liquid is an occasional helper. For every normal wash the rest of the year, stick to a decent car shampoo on its own.
Common mistakes that cause streaks (and what to do instead)
Using boiling hot water
Hot water flashes off quickly, leaving detergent behind. Use lukewarm at most.Washing in full sun
Panels heat up, water dries patchily and pollen bakes in. Aim for shade or early morning/evening.Too much product in the bucket
More bubbles do not mean more cleaning. Follow the bottle, then just that one extra drop of washing‑up liquid for pollen days.Letting the car “air dry”
Pollen and minerals in tap water sit where the drops dry. Always towel‑dry if you care about streaks.Skipping protection afterwards
If you’ve used a boosted mix, refresh protection. A quick spray wax or sealant after drying restores the barrier that stops pollen sticking next time.
When to skip the washing‑up liquid entirely
There are times when even that tiny drop is not worth the risk:
- On freshly ceramic‑coated cars still under warranty.
- On matte or satin finishes, which should only see approved products.
- If you wash weekly and already use strong pre‑washes or traffic‑film removers.
- On very old, oxidised paint, which may be fragile enough without extra degreasing.
In those cases, lean on snow foams, citrus pre‑washes and quality shampoos instead. Technique-rinse, gentle contact, thorough drying-will carry you most of the way.
Turning a boring wash into easy, repeatable results
Think of this as a rhythm rather than a one‑off hack. Once you’ve seen how a well‑diluted, slightly boosted shampoo mix makes pollen slide away and leaves glass clearer, it becomes a quiet part of your spring routine.
You still:
- Rinse first.
- Wash top‑down with two buckets.
- Rinse thoroughly.
- Dry carefully.
- Top up protection when needed.
The washing‑up liquid is just a supporting act, not the star. Used with restraint, it gives you what you actually want out of a Saturday on the drive: clean, streak‑free paintwork that still beads in the rain-and a car that looks like you tried harder than you really did.
FAQ:
- Will washing‑up liquid damage my car’s paint? In large amounts and used regularly, it can strip wax and dry out rubber. In a tiny dose, mixed with proper car shampoo a few times a year, the risk to healthy modern paint is low.
- Can I wash the whole car with just washing‑up liquid if I’m in a rush? It will get the car looking clean, but you’ll remove protection and may notice the paint feels rough and flat over time. Treat that as an emergency option, not a routine.
- How often can I use the “tiny drop” trick? Limit it to heavy‑duty cleans: peak pollen weeks, post‑winter grime, or before polishing and re‑waxing. The rest of the year, use car shampoo alone.
- Do I still need wax or sealant if I use this method? Yes. Shampoo cleans; wax and sealants protect. A protected car stays cleaner for longer and makes every future wash easier.
- What if I don’t have two buckets or special mitts? You can still improve results by rinsing the sponge often under running water, working top‑down, and drying with the softest clean towel you own. The tools help, but the method matters more.


Comments
No comments yet. Be the first to comment!
Leave a Comment