Those tiny lines between your tiles have a way of making the whole room look tired. You scrub the bathroom floor, wipe down the shower screen, step back – and all you can see are grey, blotchy grout joints framing everything in a dull outline.
Most people respond by reaching for the big guns: bleach spray, ammonia-based cleaner, something with a skull and crossbones on the back and a promise of “power foam”. The smell hits the hallway, your eyes start to sting, and the grout still looks faintly dirty once it dries.
Sitting quietly in a different cupboard is a third bottle. No neon label, no cartoon bubbles. Just a clear liquid you probably bought for a cut or a pierced ear and then forgot about.
That liquid – plain 3% hydrogen peroxide – is one of the simplest ways to make grout lines look almost newly tiled again.
Why harsh “instant white” cleaners backfire on grout
Bleach and ammonia do work, up to a point. They blast through organic stains, dull off‑white marks and some surface mould. The trouble is what they do at the same time – to you, and to the grout.
Bleach is alkaline and chemically aggressive. Used straight, or too often, it can:
- Erode the top layer of cement-based grout, leaving it rough and more porous.
- Fade coloured grout unevenly, so patches go chalky while others stay dark.
- Corrode nearby metal trims and fittings, especially if it runs and pools.
Ammonia-based cleaners come with their own baggage: strong fumes, irritation of the lungs and eyes, and a tendency to clash badly with other products. Mix ammonia with bleach – even accidentally, on a cloth or in a bucket – and you release chloramine gas. That “peppery” cloud isn’t just unpleasant; it’s dangerous.
Indoors, especially in small bathrooms with poor ventilation, those fumes don’t magically disappear the moment you close the bottle.
Strong cleaners give a quick high-impact smell and a short-lived visual result – but often leave the grout weaker, not cleaner.
Over time, softened grout holds onto dirt more stubbornly. You scrub harder, reach for even harsher products, and the cycle continues.
The clear liquid hiding in the first-aid box
Hydrogen peroxide looks like water, pours like water and, at low strength, smells of almost nothing. The standard 3% solution sold in chemists as an antiseptic is exactly the kind you want for grout.
Chemically, hydrogen peroxide (H₂O₂) is a mild oxidiser. In contact with light, heat and organic matter, it breaks down into plain water and oxygen gas. Those tiny oxygen bubbles are what used to fizz on your grazed knees – and they do something similar to dingy grout.
They:
- Break apart the chemical bonds in many common stains (soap scum, food, tea, mildew marks).
- Loosen the film of biofilm and grime clinging to grout pores.
- Lightly disinfect without leaving a heavy residue or long‑lasting fumes.
Unlike chlorine bleach, hydrogen peroxide doesn’t contain chlorine compounds, and at 3% it sits in a sweet spot: strong enough to be useful, gentle enough for most ceramic tiles and cementitious grouts when used sensibly.
It’s the quiet type of cleaner: clear, almost scentless, and surprisingly effective once you let it sit and work.
What it actually does to grout grime
Most “dirty grout” isn’t one single substance. It’s a film made from:
- Soap and shampoo residues.
- Body oils and skin cells.
- Tracked-in dust and fine soil.
- Mould spores and mildew pigments in damp corners.
Hydrogen peroxide targets the organic part of that film. It oxidises and lifts the coloured compounds that make stains look dark or yellow, while helping loosen the greasy layer they sit in.
There is one important exception: heavy limescale. In very hard-water areas, grout in showers can develop a crust of mineral deposits. Peroxide doesn’t dissolve that very well on its own; you may need a separate descaler or white vinegar first, then peroxide afterwards for the remaining discolouration.
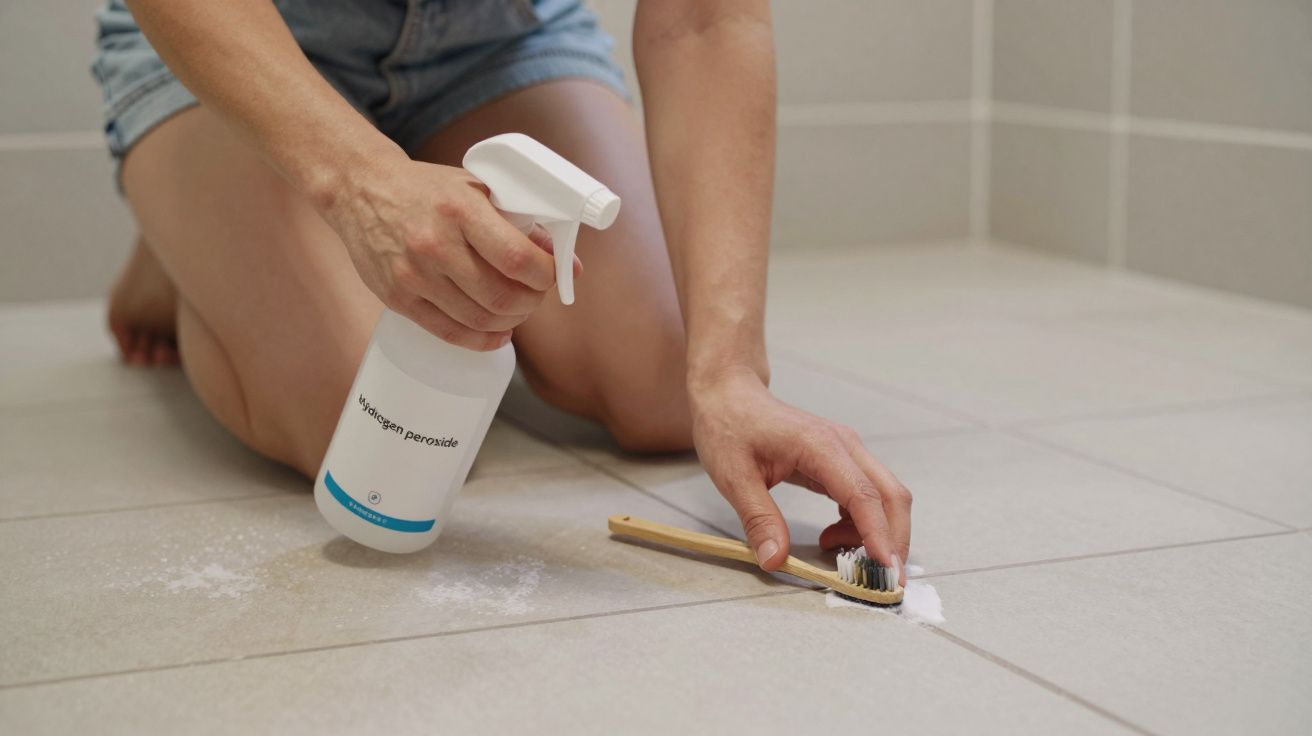
How to make grout look newly tiled with hydrogen peroxide
You do not need a laboratory set‑up for this. A small bottle of 3% hydrogen peroxide, bicarbonate of soda and an old toothbrush will take you a long way.
Option 1: The simple spray-and-brush method
Good for light to moderate dinginess on walls and floors.
Clear and dry the area
Remove mats and bottles. Give the tiles a quick wipe so you’re working on dust‑free surfaces. Let the grout dry if it’s recently been wet.Decant the peroxide
Pour 3% hydrogen peroxide into a clean spray bottle, or keep it in its original bottle if it already has a nozzle. Do not dilute it further.Apply generously
Spray or drizzle along the grout lines until they’re well-wetted but not streaming. Focus on the darkest joints.Let it sit
Leave it for 5–10 minutes. You may see gentle fizzing as it reacts with grime. Keep the room ventilated and pets/children away while it works.Scrub in lines, not circles
Use a soft or medium-bristled brush (an old toothbrush is ideal) and scrub along the grout joints. Avoid stiff wire brushes; they can gouge the grout.Rinse and wipe
Rinse with clean water – a damp cloth, mop or a quick shower spray – then wipe the tiles and grout to remove loosened residue.Assess and repeat if needed
Some deep stains may need a second round. It’s usually better to repeat a gentle treatment than to jump straight to harsh chemicals.
Option 2: The deep-clean paste for stubborn stains
For heavily stained grout, the combination of peroxide and bicarbonate of soda adds mild abrasion and extra lifting power.
Mix a paste
In a small bowl, combine bicarbonate of soda with just enough 3% hydrogen peroxide to form a thick, spreadable paste – roughly 3 parts bicarb to 1 part peroxide.Apply precisely
Use a small spoon, gloved finger or brush to press the paste directly onto the grout lines. Keep it mostly off the tiles.Leave it to work
Let the paste sit for 10–15 minutes. It should stay damp; if it dries to a crust, mist it lightly with more peroxide.Scrub gently
Work the paste into the grout with your brush, again following the line of the joint.Rinse very thoroughly
Remove all traces of paste with clean water. Pay attention to textured tiles where residue can hide.Dry and inspect
Once dry, most grout lines should look noticeably lighter and more even. A second, lighter round can tidy any remaining patches.
Patch tests and surface safety
Most standard ceramic and porcelain tiles, and standard cement-based grout, tolerate 3% hydrogen peroxide well. Still, surfaces are not all created equal.
Do a quick patch test if you have:
- Natural stone (marble, limestone, travertine, slate).
- Dark, highly polished tiles.
- Special-effect metallic or crackle glazes.
- Coloured or dyed grout.
Apply peroxide (or the paste) to a hidden corner, wait 15 minutes, rinse and check for any change in colour or texture once dry. If in doubt with natural stone, check the manufacturer’s care guidance – many recommend only pH‑neutral cleaners.
When peroxide is not enough
Hydrogen peroxide is a cleaner and brightener, not a full renovation in a bottle. Some grout problems are structural rather than cosmetic.
Peroxide will not fix:
- Cracked, crumbling or missing grout.
- Black mould that has penetrated deeply into silicone sealant.
- Stains from rusting metal beneath tiles.
- Grout that was badly discoloured or uneven from day one.
In those cases, cleaning may improve the look slightly, but long-term results come from:
- Raking out and re‑grouting damaged sections.
- Cutting out and replacing mouldy sealant.
- Tackling moisture issues and ventilation so mould has less reason to return.
A clear liquid can revive tired grout – it cannot rebuild it.
Bleach, ammonia, peroxide: a quick comparison
| Cleaner | Main downside | Where peroxide wins |
|---|---|---|
| Chlorine bleach | Harsh fumes, grout erosion over time | Gentler on grout, fewer lingering odours |
| Ammonia cleaners | Strong smell, risky with other products | No risky chlorine–ammonia gas mixes |
| 3% hydrogen peroxide | Slightly slower on heavy grime | Breaks down to water + oxygen, good balance of power and safety |
Keeping grout clean for longer
Once you’ve put the effort into reviving your grout, a few small habits help it stay looking newly tiled for far longer.
In showers and wet rooms
- Run a squeegee over tiles after use to remove water and soap film.
- Keep an extractor fan on for 10–20 minutes after showers.
- Use a quick peroxide spray on problem corners every couple of weeks.
- Run a squeegee over tiles after use to remove water and soap film.
On kitchen splashbacks and floors
- Wipe splashes promptly, especially tomato, curry, coffee and wine.
- Do a light peroxide-and-water wipe along grout lines monthly instead of waiting for deep grey stripes to appear.
- Wipe splashes promptly, especially tomato, curry, coffee and wine.
Consider sealing grout
Once your grout is thoroughly clean and dry, a penetrating grout sealer can reduce how readily it absorbs stains. Follow product directions and re‑apply as recommended.
Small, regular care beats heroic rescue jobs every winter.
FAQ:
- Can I use hydrogen peroxide on coloured grout?
Often yes, but it’s essential to patch test first. Some heavily dyed grouts can lighten slightly with repeated use, especially if you use a bicarb paste and vigorous scrubbing. Test a hidden area, let it dry fully and compare before doing the whole wall or floor.- Is it safe to mix hydrogen peroxide with other cleaners?
Do not mix peroxide with vinegar, bleach or anything containing chlorine – the reactions can be unpredictable and may release irritating gases. Use peroxide on its own, or with plain bicarbonate of soda as a paste.- Will stronger peroxide work better?
Higher strengths (6%, 9% and above) are more aggressive and can damage surfaces and skin. For household grout, 3% is usually the best balance; you can repeat treatments rather than jumping to stronger solutions.- Does peroxide kill mould, or just bleach it?
3% hydrogen peroxide helps disinfect the surface and fade mould staining. On minor surface growth it can be very effective. Deep-rooted mould in silicone or behind tiles, however, often returns unless you address moisture and, if needed, replace affected materials.- Is hydrogen peroxide safe around pets and children?
Once used and rinsed, it breaks down into water and oxygen. While you’re cleaning, keep pets and children out of the area, wear gloves, and store the bottle securely. Never leave open containers or soaked cloths where they can be knocked over or mouthed.


Comments
No comments yet. Be the first to comment!
Leave a Comment